
The first time I ever made a living wreath, it was for planting succulent cuttings we were giving to a bunch of ladies at my grandma’s church. It was Grandma’s way of giving the gift of life, but with a little something extra. We carefully cut succulent cuttings from the bigger plant, then put them in a bowl while Grandma made tea and cookies. One of my aunts would pull out the moss, wire wreath forms, yarn and ribbons. Then, we would sit around the big wooden table and talk while carefully constructing the living wreaths I will be teaching you to do below. So, grab a hot cuppa and think of all the warmth you can bring to your life with this simple technique of making a living wreath.
Please note this is one method, and it’s good for an inexpensive wreath that can be easily taken apart. I’ll cover a more permanent version in a later post.
What you’ll need:
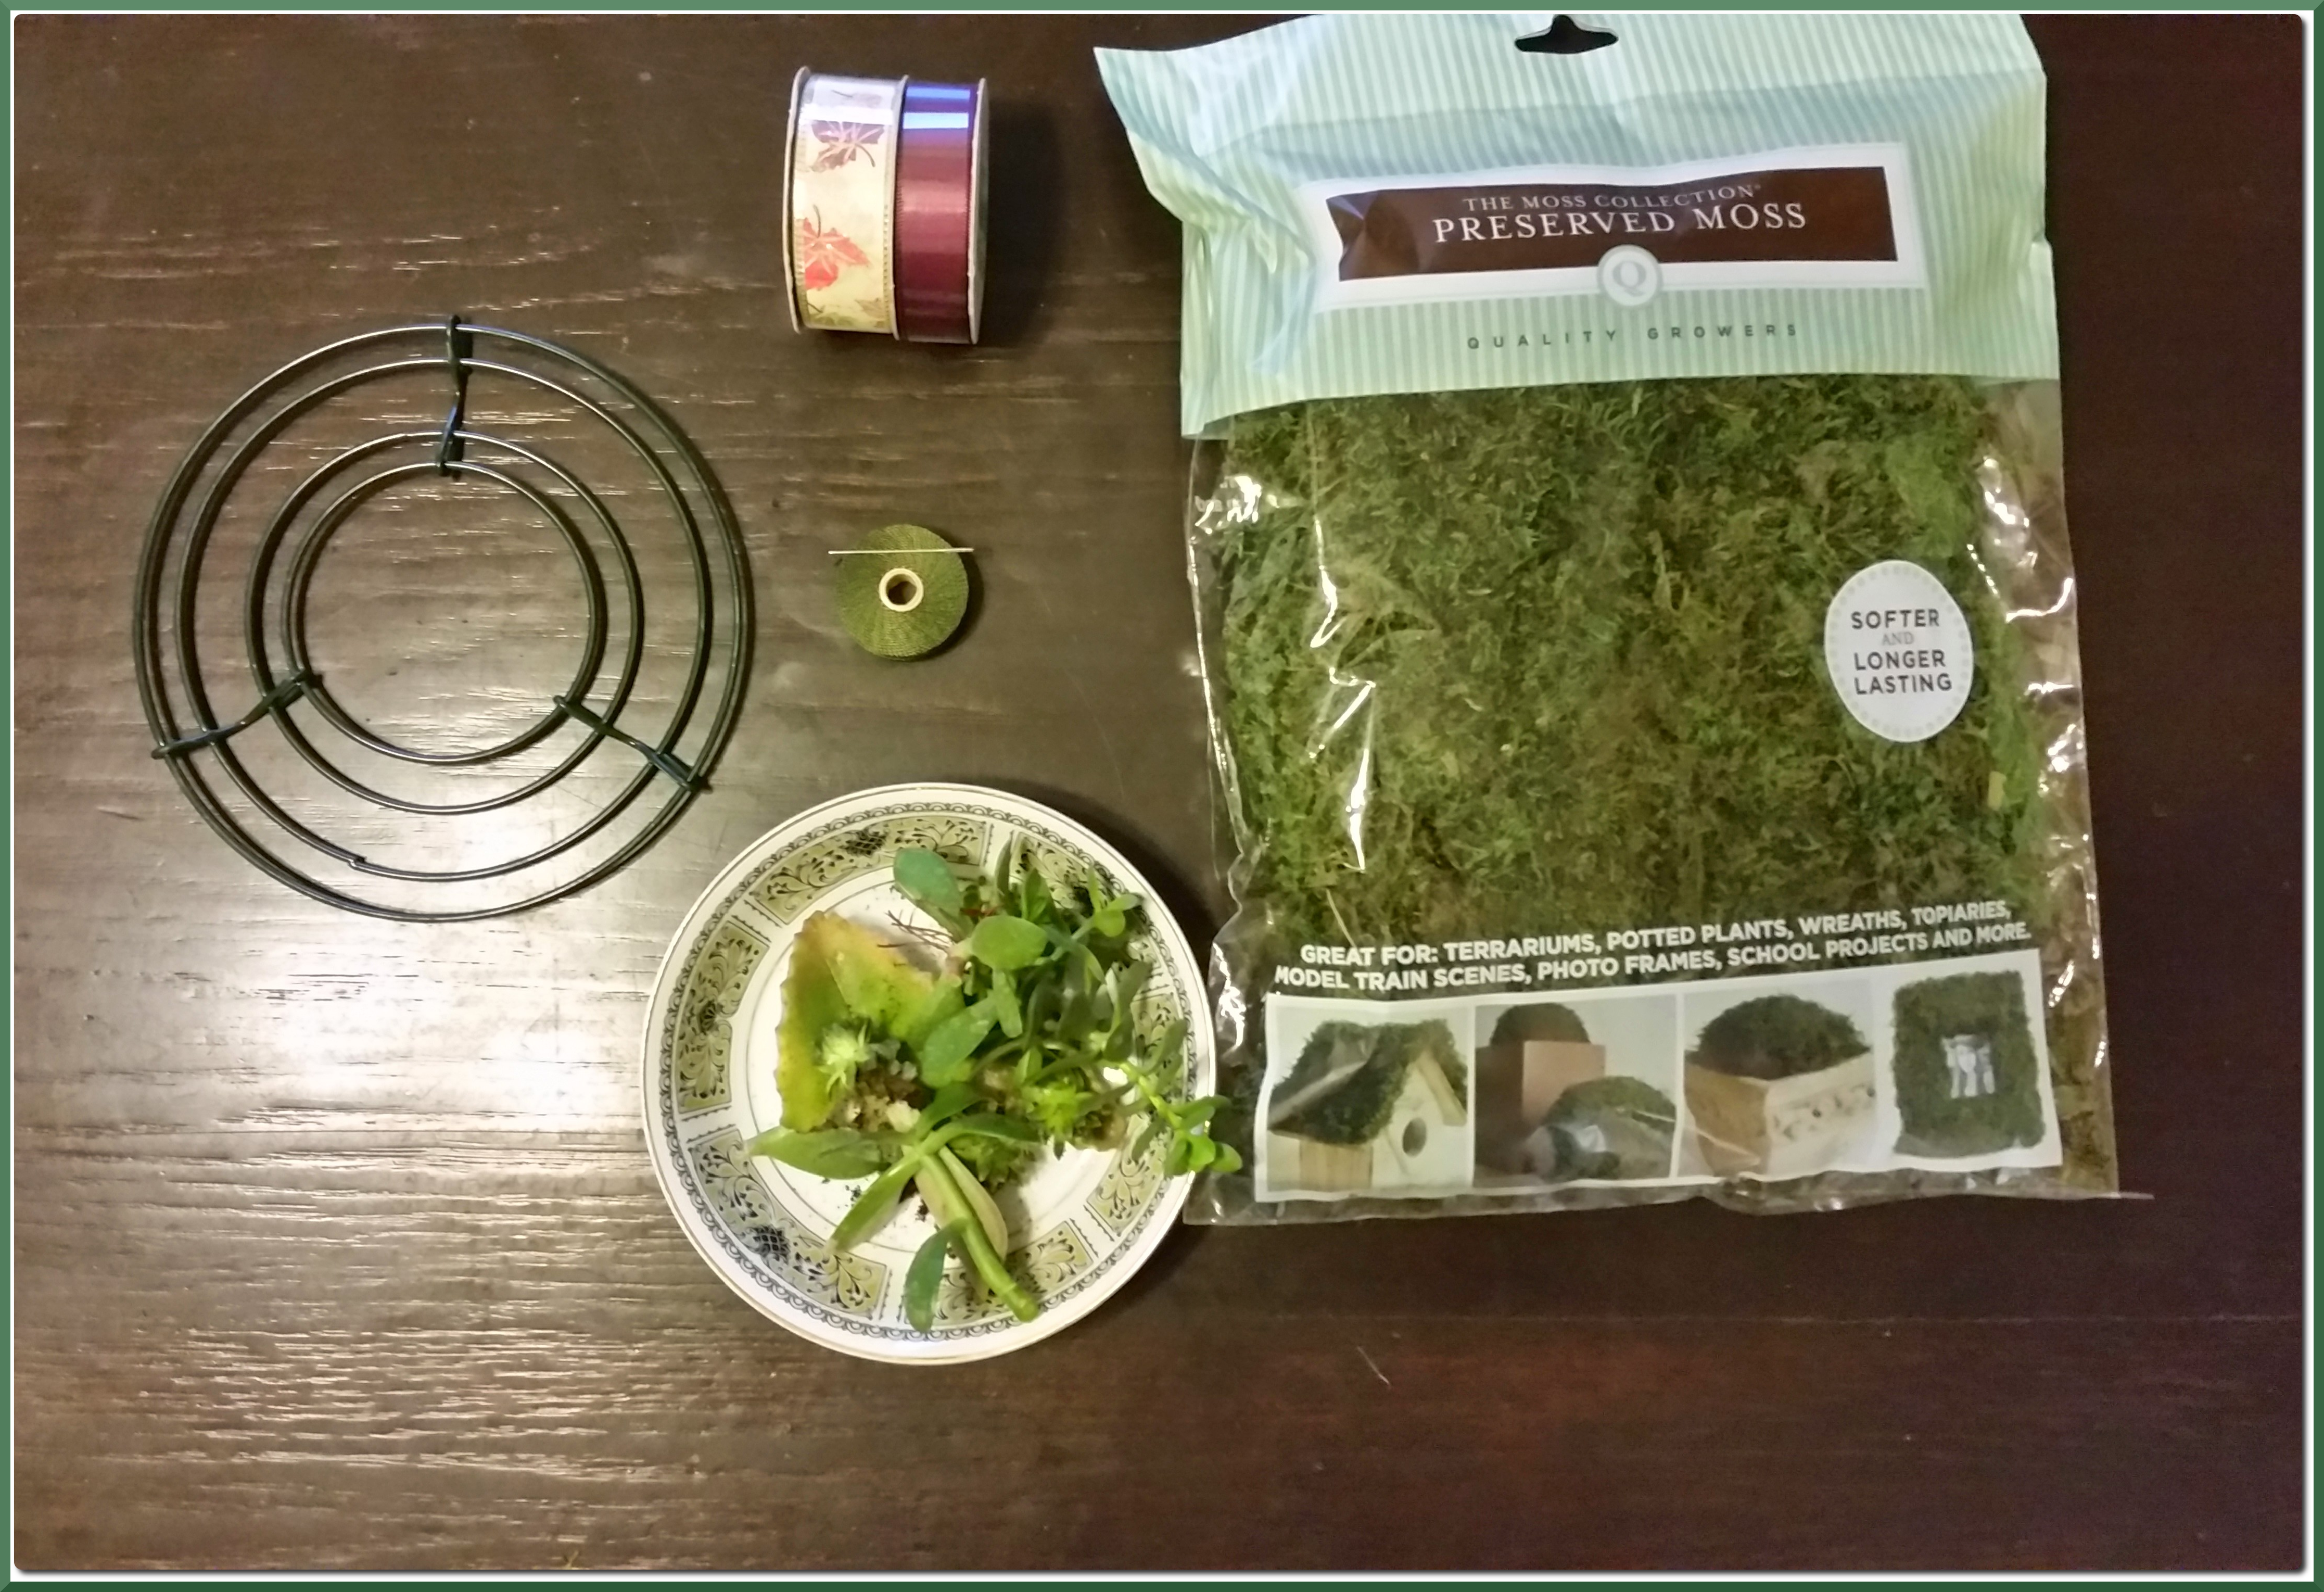
- Wire wreath form
- Thread and needle (or yarn if you want to add more colour)
- Succulent cuttings
- Moss
- Decorations (if desired)
Step 1:
Lay out your cuttings on the wire to make sure you have enough of them to fill the wreath as much as you want. This not only serves to give you an idea of what you have, but how you might lay them out to play with all the elements you want to put on the wreath.

This one is purposefully scant because I’m giving it to a friend as a house-warming gift, and she won’t have much room for the succulents once they’ve outgrown their wreath. However, you can fill these up pretty well if you want. In fact, the more full it is, the better they look without adding decorative elements that can wear out with the seasons or multiple waterings.
Step 2:
Place and secure the moss by adding a layer of moss to the wreath, then wrapping it with the thread or yarn.

On this one I used a dark green thread thread because the person I’m giving it to prefers simple. However, when I want to shake it up a bit and secure the moss with something a little different to add a pop of colour or texture. My favourite is scrap of the fancy yarn that can add both colour and texture for an artistic look.
Adding moss to both sides makes it so you don’t have to spritz the wreath as often because it can hold more water. I like to add moss to most places on both side, but leave the back free in one spot so I can hang it from a nail in the wall. This makes the nail hidden and you don’t need any additional hardware to hold it up.
Step 3:
Place and secure the cuttings with thread and need or a fine piece of yarn.
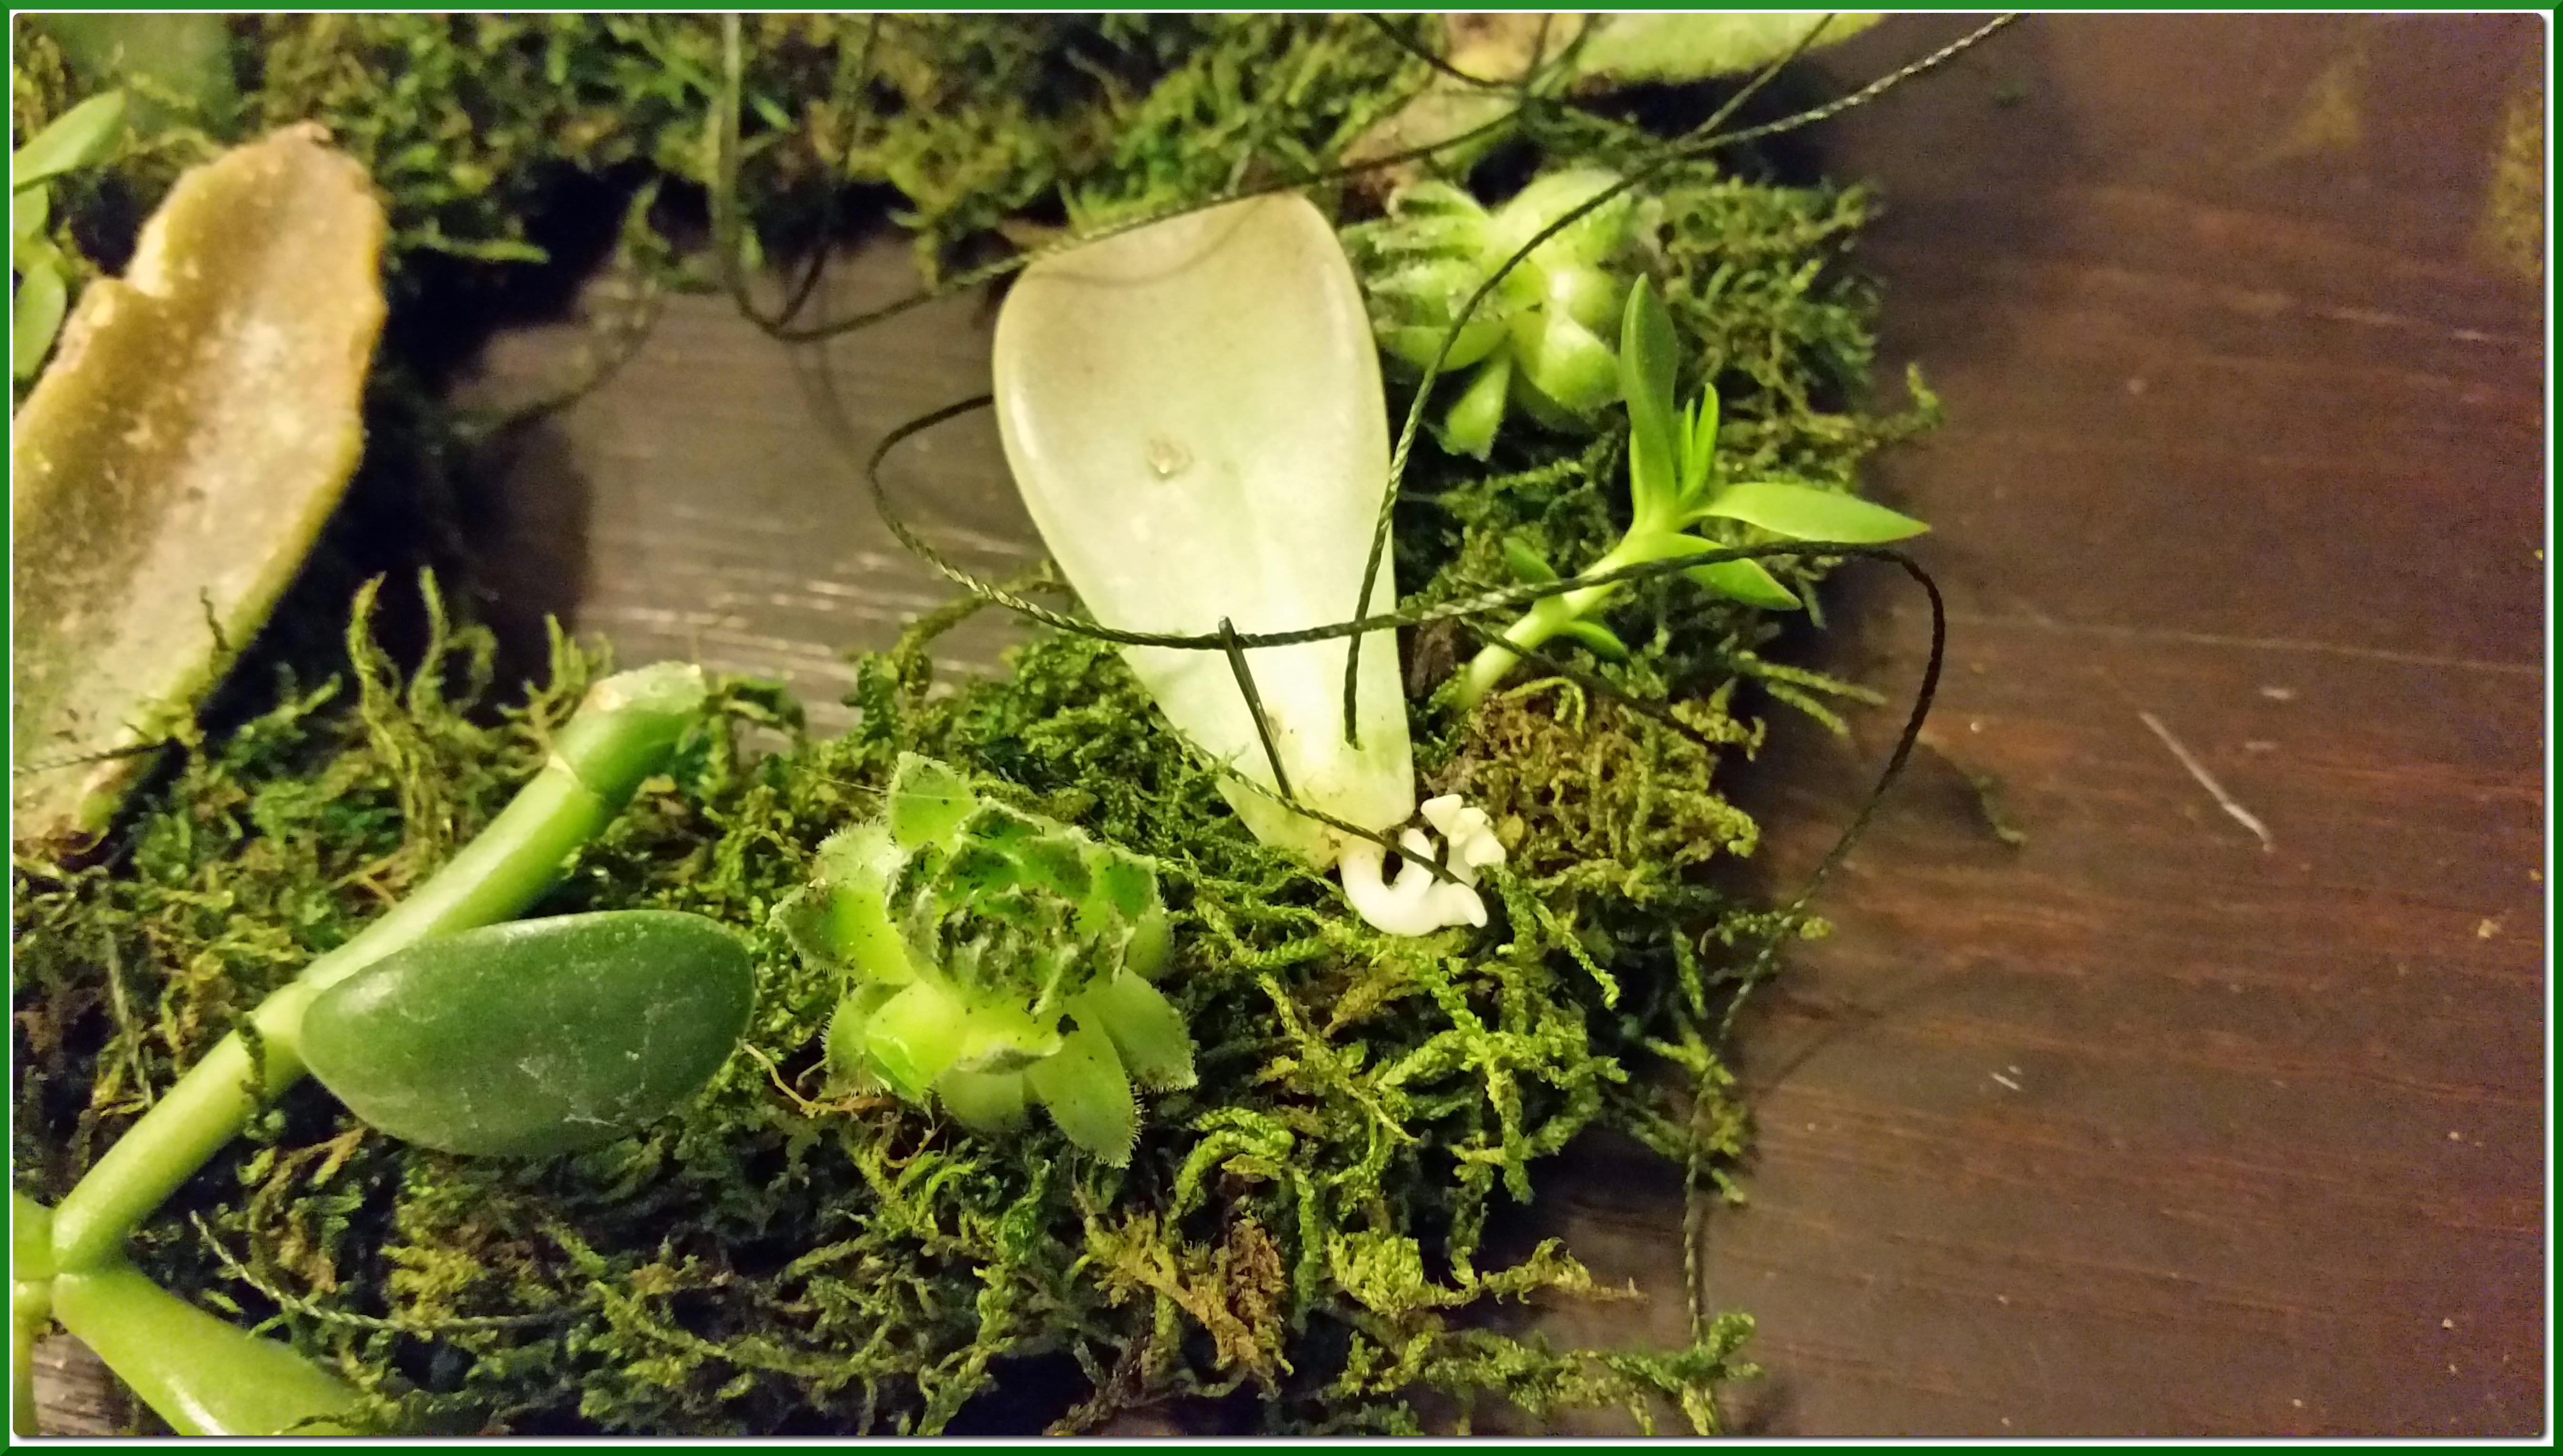
You can attach big, flat leaves by sewing two dainty stitches in them. It won’t hurt the leaves one bit, and it actually gives them more ability to take up water so they can root. Hens and chicks, as well as other circular specimens can be stitched through the base of the lowest round of leaves by going in one side and out the other.
Small, tubular specimens like the jade on the far bottom left of the image above should NOT be stitched. When you do, the stem dies off and it will not reroot. instead, secure with a tiny cross-stitch X around the stem and root node for the best way to secure these types of specimens.
As a side note, this wreath design is meant to root the succulents so they can be taken out later. Don’t go crazy securing the cuttings, otherwise when they outgrow their wreath, they will be difficult to remove to a better location.
Step 4:
Add decorations as desired.

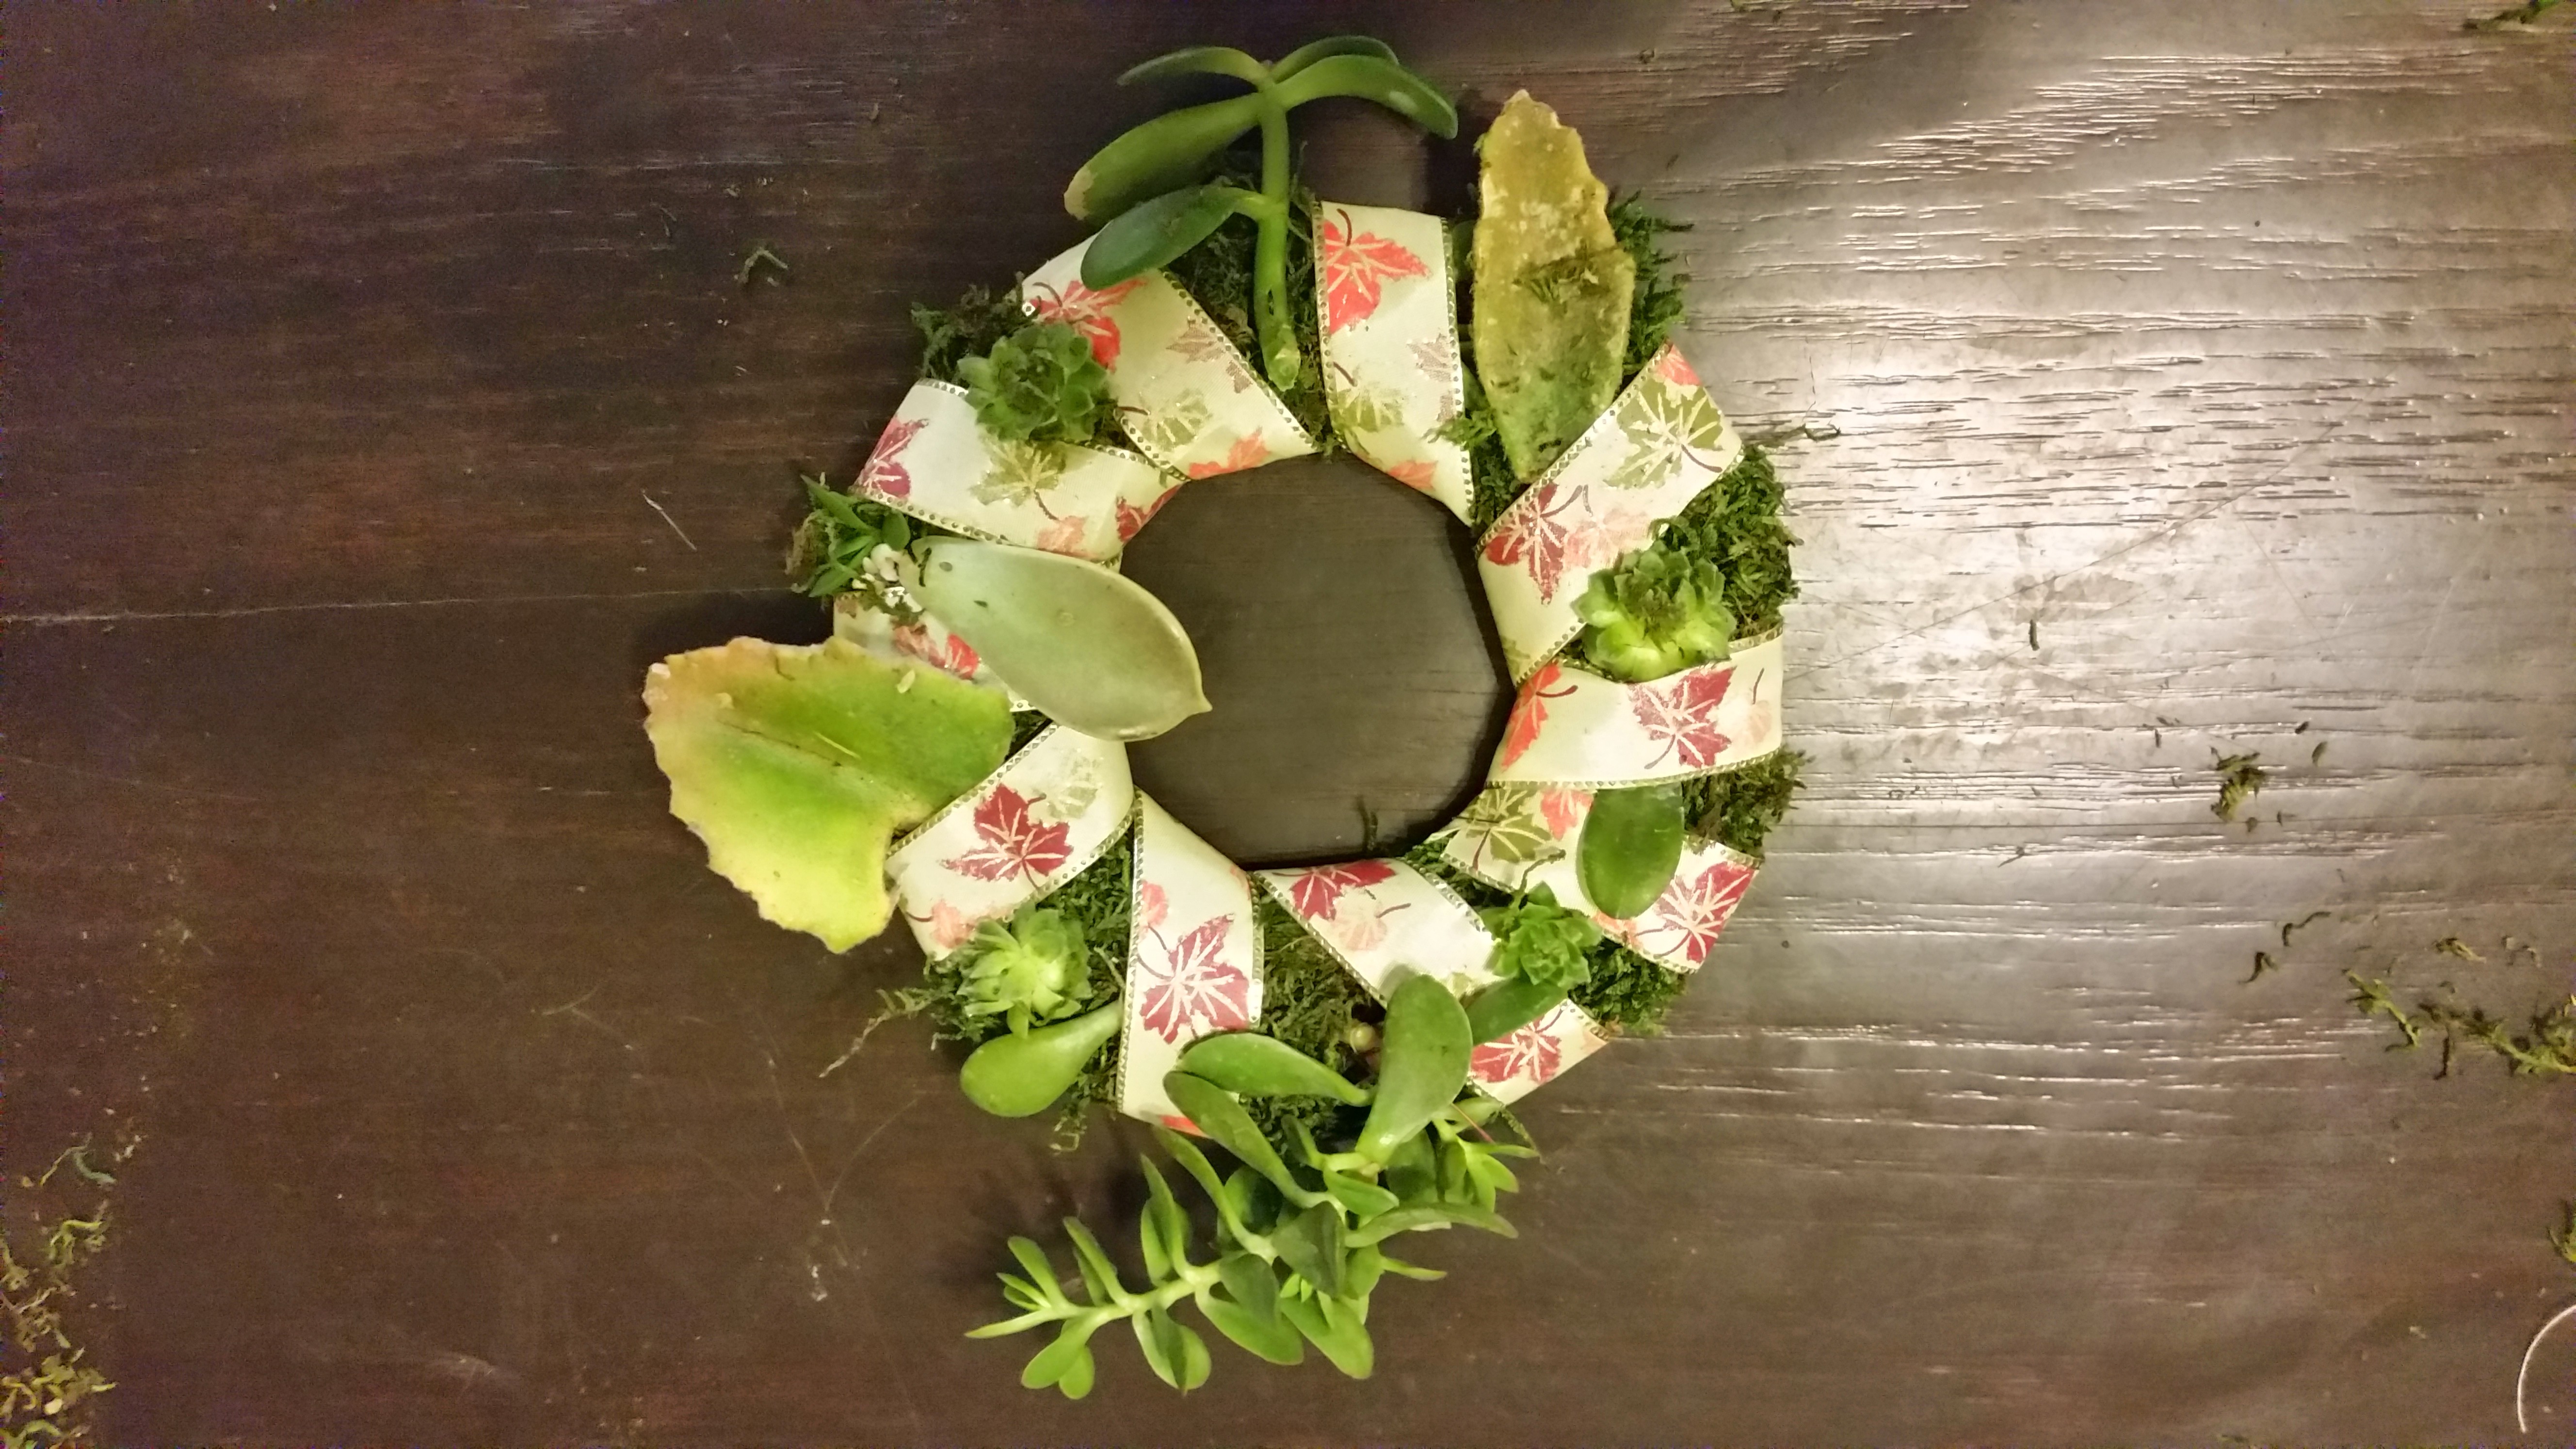
I jazzed this up by simply adding a ribbon that I wrapped around it and between the cuttings, but there are so many more options that are limited by your imagination. For instance, you can add tiny pine cones, acorns, mini cake decorations, or even hand made ornaments from your children if the wreath is big enough.
Living wreath care
Living wreaths are not something to simply make and forget. This type of wreath can be either soaked or misted regularly for it’s waterings. If you opt to soak, make sure the moss is dry to the touch without being crunchy. This ensures that you are not over watering the cuttings so they would rot.
Misting can be done daily or every few days if you soak the moss every misting. This, personally, is my favourite method because I can add a few drops of essential oils to the water to make a nice smelling area as well.
In about 2 months the rootlets from the succulents should begin to form, and a few months after that depending on the species you added to the wreaths, the roots should be fully entwined. It is best to move them to a bigger wreath or other pots before they out grow their wreath.
Over to you!
This is just one of many designs for succulent cuttings and living wreaths. The SUF community would love to see your renditions of a living wreath, so show off in the comments!